How to Create a Coverage Map for Your Website in Minutes
Overview
ServiceAreaWidget lets you easily add a coverage map or interactive service area lookup tool to your website. This guide will walk you through creating and embedding your coverage map in just a few simple steps.
Step 1: Create Your Account
- Visit ServiceAreaWidget.com
- Click "Try it free" to start your 7-day trial or a free plan
- Create your account
Step 2: Define Your Service Areas
- From your dashboard, click "Add New Area" or navigate to Manage Areas
- For each service area:
- Give it a name (e.g., "Manhattan Service Zone")
- Add an optional description
- Choose your drawing method:
- Polygon: Draw a custom shape by clicking points on the map
- Circle: Create a circular zone with a specific radius
- Freehand: Draw naturally with your mouse for organic shapes
- Draw your area on the map using your chosen method
- Click "Create Area" to save
Great! You've created your first service area. If you just want a simple coverage map, you can skip ahead to Step 5. For more advanced setups with custom areas and detailed control over results, continue with Step 3-Step 4.
Step 3: Set Up Custom Triggers and Actions
This feature is available on paid plans only.
- Navigate to "Triggers & Actions" in your dashboard
- Configure responses based on location match:
- Redirect to specific landing pages
- Show custom contact forms
- Display targeted promotions
- Trigger chat widgets
- Set up email notifications
- Customize out-of-service responses:
- Show alternative service options
- Collect lead information
- Display nearest service location
- Redirect to partner websites
Step 4: Customize Your Fields
This feature is available on paid plans only.
- Go to "Fields" in your dashboard
- Add custom fields for each service area, such as:
- Service hours
- Pricing information
- Contact details
- Special offers
- Call-to-action buttons
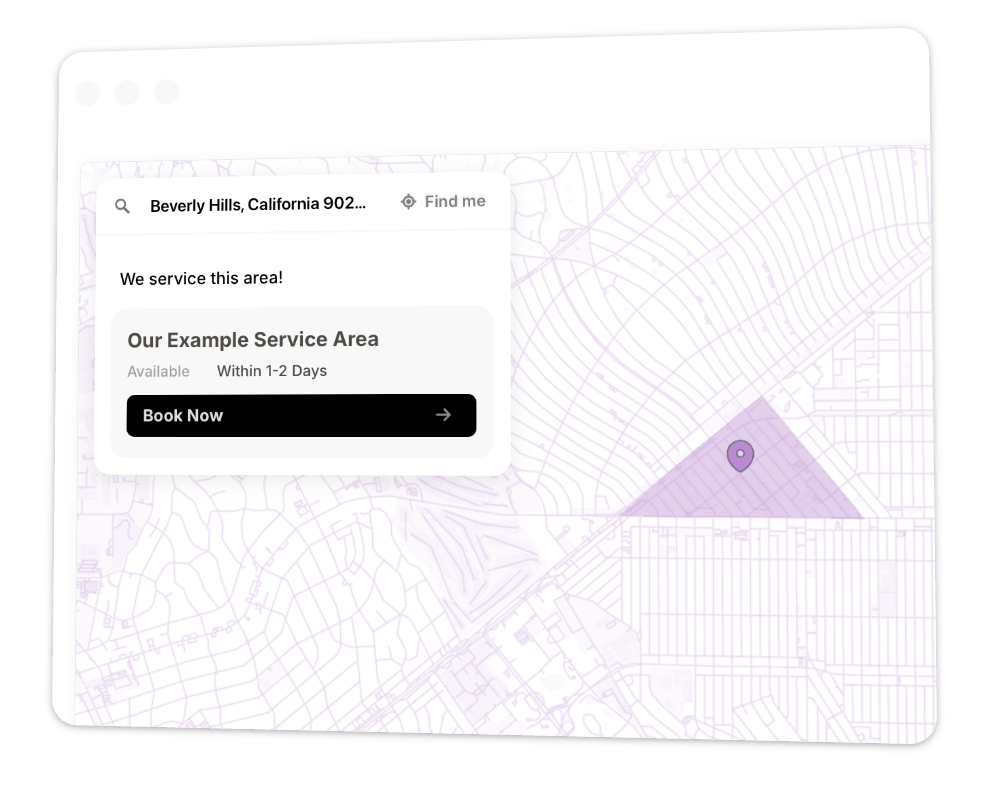
Step 5: Preview Your Map
- Navigate to "Widget Settings" in your dashboard
- Customize your widget's appearance:
- Choose between map view, search bar, or both
- Select your color scheme
- Adjust map style and zoom levels
- Customize messages for in/out of service areas
Step 6: Add to Your Website
- Go to "Embed On Your Website" in your dashboard
- Find your unique embed code - this code is specific to your account and contains your personal widget ID
- Copy the entire code snippet from your dashboard (don't use example code from elsewhere!)
- Paste the code into your website where you want the widget to appear
Platform-Specific Instructions:
WordPress
- Edit your page
- Add a "Custom HTML" block
- Paste the embed code
- Update/publish your page
Shopify
- Go to Online Store → Pages
- Edit your page
- Click the
</>HTML editor icon - Paste the embed code
- Save changes
Squarespace
- Edit your page in Squarespace
- Add a "Code" block to your page
- Paste the embed code
- Save and publish your changes
Webflow
- Open your page in the Webflow Designer
- Add an "Embed" element to your page
- Paste the embed code into the "Embed Code" field
- Publish your changes
Wix
- Edit your Wix site
- Click the + button to add an element
- Search for and add "HTML iframe"
- Click "Enter Code" and paste the embed code
- Click "Update" and publish your site
Other Platforms
- Look for options like "Custom HTML", "Embed Code", or "HTML/JavaScript"
- Paste our widget code into these areas
- Save and publish your changes
That's It!
Your service area widget is now live!
Need assistance? Email us at [email protected]